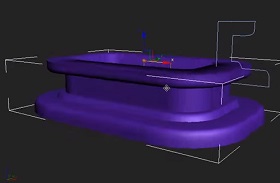
In this video tutorial we will see how to change the profile of a 3D shape with another shape. We will use Bevel Profile in Autodesk 3ds Max. This modifier may look similar to a lofted object with different scale settings, but it differs in that it uses different contour values as distances between line segments.
Related Posts
Draw a Realistic Pumpkin with Gradients in Adobe Illustrator
this video tutorial shows how to draw a Vector pumpkin in Adobe Illustrator. The pumpkin will turn out very realistic thanks to the use of shades. An excellent drawing lesson…
Correctly use Alpha Channels n Cinema 4D
This video tutorial explains the use of alpha channels and shows how to use them in Cinema 4D. A correct way to get rid of white backgrounds and achieve optimal…
Draw a Vector Location Icon in CorelDRAW
In this video tutorial we will learn how to draw a location icon with the CorelDRAW vector graphics program. A simple lesson for making a very common graphic element on…
Realistic Hourglass Lion Modeling in 3ds Max
This video tutorial shows how to model an hourglass decorated by two lions using 3ds Max. A complete exercise showing the entire modeling process. A lesson suitable for mid-level users…
Modeling a Pokeball in Blender
Pokemon seem to have come back very fashionable in recent times especially in the applications of 3d games. In this video tutorial we will see how to model 3D Pokeball…
The Wood Shader in Maxon Cinema 4D
This video tutorial tries to make things a little easier for you by explaining the wood material in Cinema 4D. One way to get more brilliant results.


