When you try to add realism by creating dirt for your 3D art, it can sometimes be ‘too easy to get lost’. In this tutorial you will learn a simple technique to add dust and dirt to 3D objects without overdoing them, give them a more realistic look. The software that will be used is Maya, but this technique can be used on almost all 3D models, and can be easily repeated in all the most important 3D packages on the market.
Related Posts
06
Feb2013
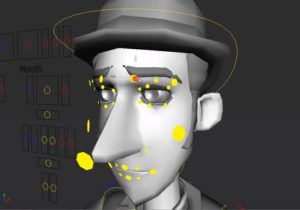
Facial Rigging in Maya – Tutorial
In this video Tutorial is presented, an easily understandable way, to animate a face in Autodesk Maya. The lesson, therefore, deals with facial rigging, which is extremely important for achieving…
13
Nov2012
Make realistic grass in Autodesk 3Ds MAX
In the exercise we are going to follow we will learn how to create some grass in the Autodesk 3ds Max environment with the help of Hair and Fur Modifiers.…
18
Nov2013
Rigging with Hair in Maya – Tutorial
This video tutorial shows how to use Maya’s i Hair system to create dynamic movement with springs. A system to make animations simpler by using the engine created to create…
03
Feb2019
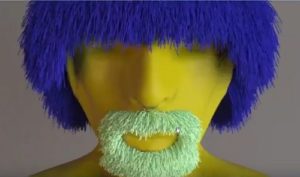
Make Realistic Beard for a 3D Character in 3ds Max
In this interesting video tutorial we will see how to make a realistic beard for a 3D character in Autodesk 3ds Max. A very detailed lesson that explains how to…
09
Sep2013
Creating Volumetric Lights in Maya – Tutorial
Una video-lezione in Maya che mostra come realizzare una luce volumetrica con l’utilizzo di Mental Ray. Un effetto molto realistico utilizzato anche in altri software 3D come 3ds Max che…
21
Feb2013
Animate A Wheel – Autodesk Maya Tutorial
A great Autodesk Maya video tutorial that explains how to animate a wheel with an expression. a very effective method to set the number of revolutions that the object must…